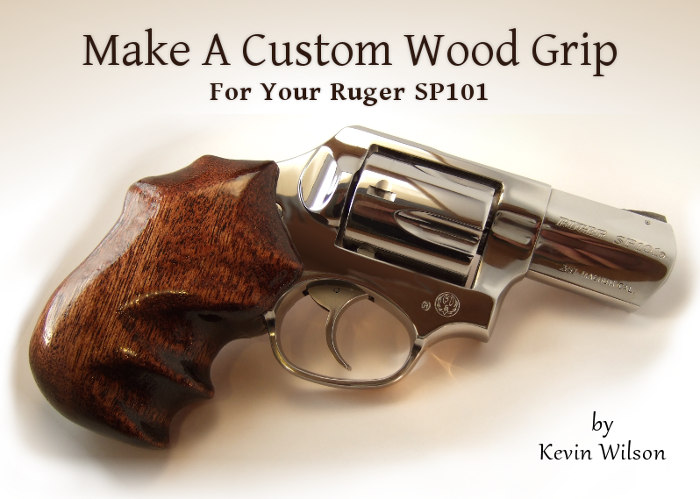
Introduction
This is a step-by-step guide for making your own custom wood grip for your Ruger SP101.
Although the factory grip was adequate, I wanted a grip that looked better, fit my hand better and did not have rubber that can grab clothing. By making my own grip I was able to meet those needs.
I've made several grips and they all fit my hand and the revolver frame very well. There's no wiggle when they're installed. I've run several dozen rounds with the grip installed and it still fits tighter than O. J. Simpson's glove. Time will tell if it holds up, but I have a feeling it'll be fine.
This guide was originally intended to be limited to my own personal use, but I've made it available in hopes that it may help others to make their own grip. Your available tools and equipment my differ from mine, so the process may have to be adapted.
Required Materials
The following items are required, helpful or optional:
- Sturdy paper
- Pencil
- Scissors
- Drill press
- Tap
- Bolt
- Wood board
- Ruler / tape measure / calipers
- Router bits
- Vise
- Wood filler
- Saw
- C-clamps
- Wood glue
- Sandpaper
- Dremel
- Stain
- Wood pore filler
- Polyurethane
- Mask, goggles
Disclaimer
I'm not a woodworking expert. The procedures will differ depending on equipment and other factors. I'm not responsible for any damage caused by the techniques or information presented in this article.
© Kevin Wilson
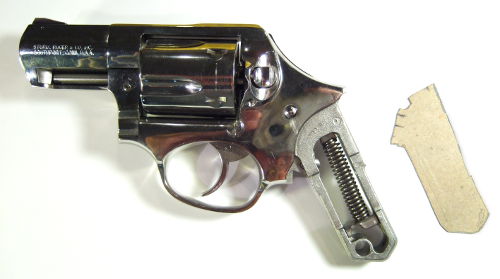
Drill and Tap For The Bolt
You'll need some way to hold the grip on the revolver. I decided to drill and tap a hole in the bottom of the frame and bolt the grip on.
To remove the factory grip: Loosen the screw on the side of the grip, but before pulling it completely out push it in to pop out the grip panel on the opposite side. Be careful not to lose the small pin behind the grip panel.
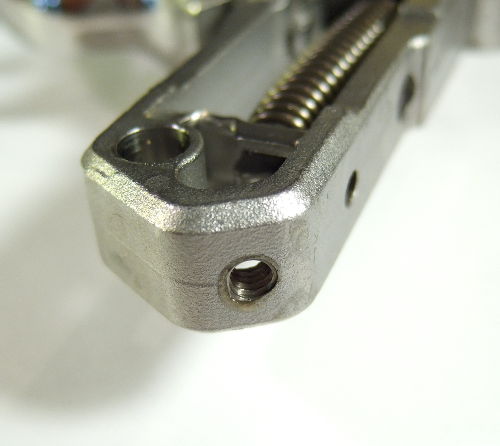
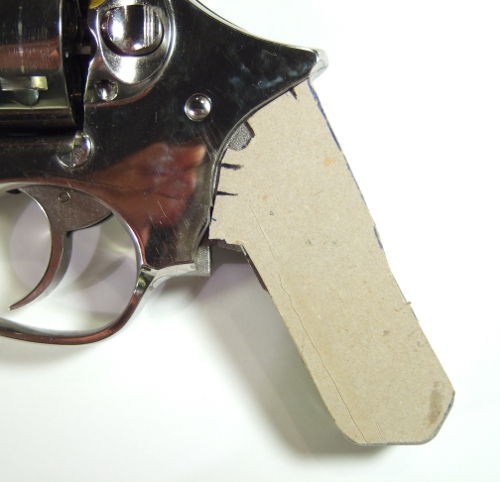
Heres the frame with the bolt.
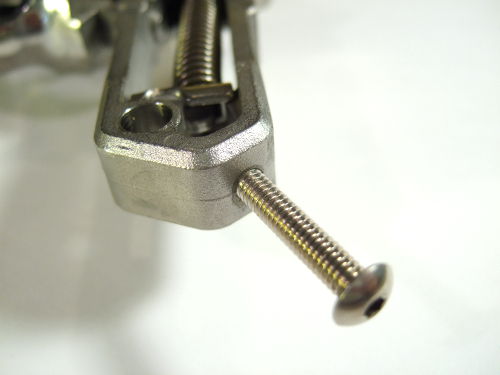
If you use this method, be sure your bolt is not too long to impede the movement of the hammer strut when the trigger is pulled. Here you can see the bolt is a little too long...
Templates
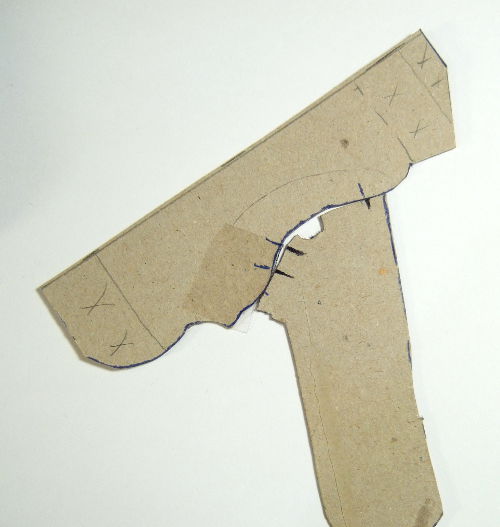
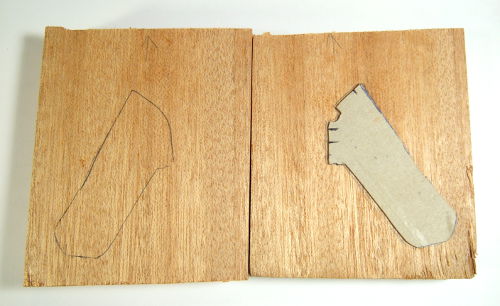
In this step you'll trace and cut out templates of your internal revolver grip frame. We'll use these templates to trace the pattern on the wood that will be routed out.
Now get some thick paper (I used a cereal box) and trace the lower part of the grip frame. Be sure to add a notch for the hammer pivot pin. Cut out the shape with scissors.
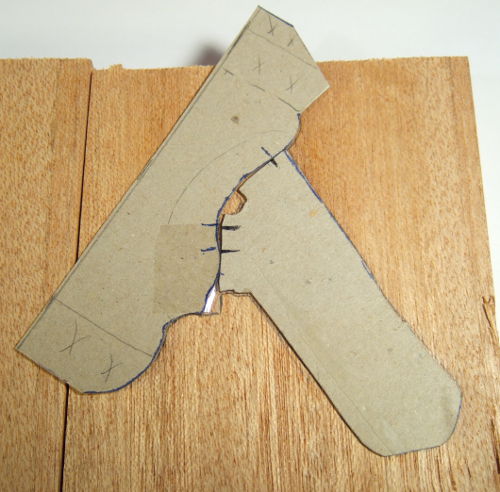
Repeat the procedure for the edge of the revolver frame where it meets with the grip. Please refer to the images to supplement this description. You need two templates because the grips will have two sections that will be routed to different depths.
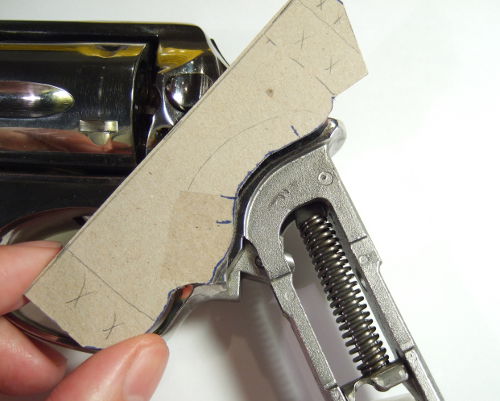
Draw some marks on the templates so that you can easily line them up with each other.
This template needs to be as accurate as possible, otherwise there will be excessive gaps between the grip frame and the wood. When in doubt cut the template a little larger. It's better for the fit to be a little loose rather than too tight, which will necessitate some wood removal. If you cut a little too much from your template, you can put a couple layers of tape on the edge and cut again.
The Wood
You may use any wood you like, but I recommend a good hardwood. I recommend a board that's 0.5" to 0.75" thick. It should be about 2.5" to 3.5" wide.
Below you can see the difference between mahogany, maple and red oak. The main difference is the grain pattern. I strongly recommend using pieces of wood with an interesting grain pattern (unless you plan to paint your grip).

I will not recommend a particular type of wood because the same type of wood can vary widely between pieces and the appearance of your grip is subjective and will be up to you.
There's a million different combinations of woods and stains. Different woods take stain differently. It's impossible to predict exactly how a piece of wood will look after it's finished. I won't make any recommendations except to say that I think smaller pieces of woodwork, like grips, generally look better with rich colors. I'd lean toward stains with a strong red or rich brown color.
Trace Cutouts
Cut your board into two pieces 4" long for a 2 finger grip or 5" for a 3 finger grip. Depending on your hand size you may want to add an inch.
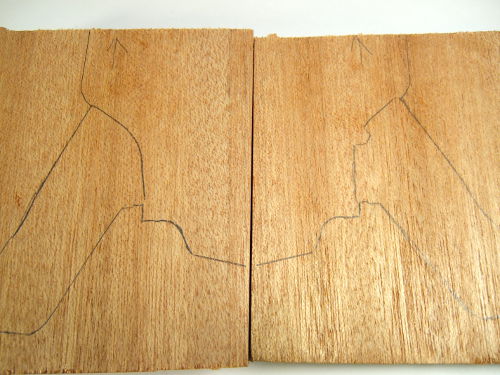
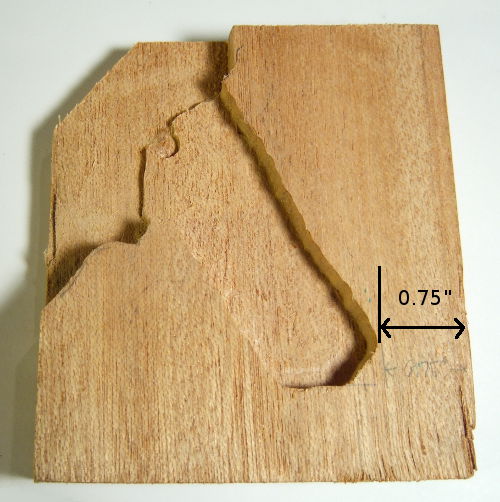
Position your board pieces next to each other. Lay your templates on the board and trace around them. You should leave about 0.75" of wood on the rear side.
Draw the bottom template first, then position the top template and line up the template using the marks you make on them. Trace the top template
Turn the template over and draw a mirror image on the other board.
Depth Measurements
We'll need to know how wide the grip frame is so we can determine how deep to route out the grip.
The bottom section of the grip id 0.5" wide.
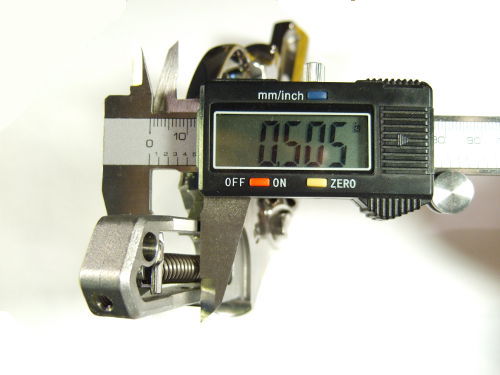
The top section of the grip will cover the frame body. The frame body is 0.7" wide.
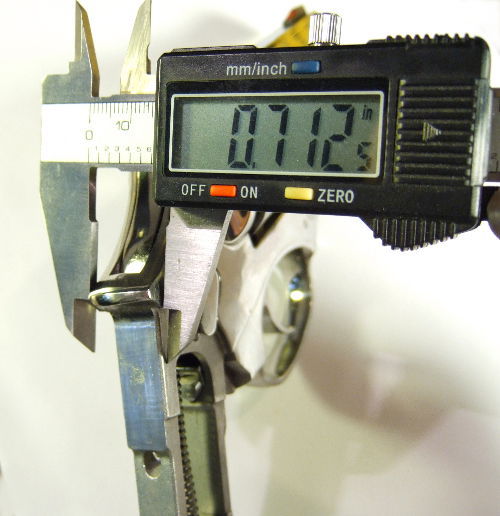
Now we know that each half of the grip will need to be routed down 0.25" for the bottom section and 0.35" for the top section.
Routing
This process will route out the cavity in the grip.
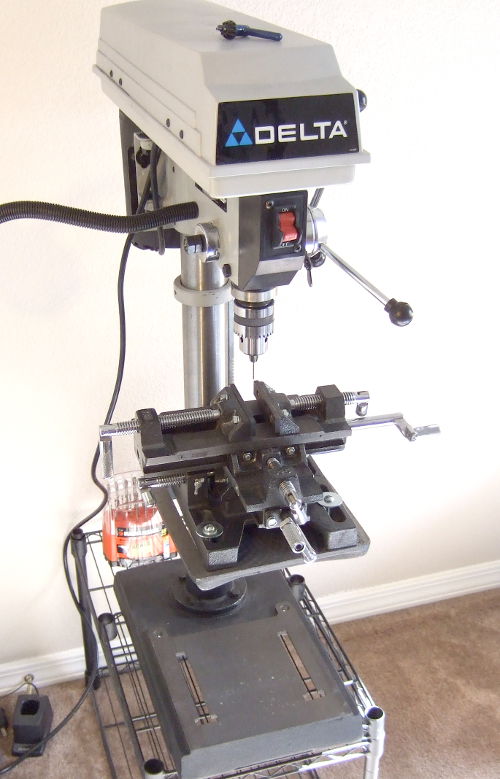
I don't have a router, so I use my drill press with a router bit. You should note that the bearings in a drill press are not designed to handle lateral forces, so I recommend a process of drilling a hole, raising the bit, moving the wood, then drilling another hole.
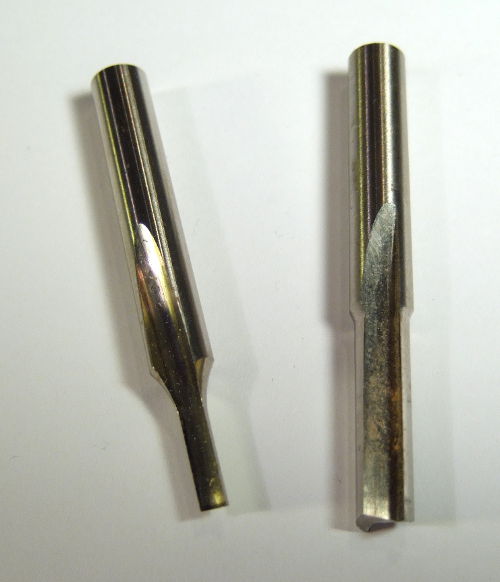
Here you can see the router bits I use.
Here you can see my drill press with my XY vice.
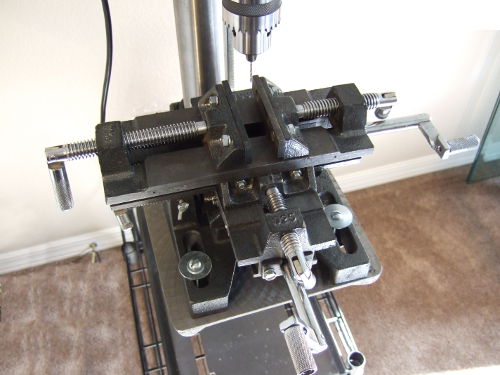
Here's a closer look at the XY vice. It's a cheap one from Harbor Freight. I think it was cast and built in some 3rd world cave / factory by weed farmers in the off season.
Mount your wood in the vice. I recommend routing the deeper section first. It's much better to route a little too deep than too shallow. Here is the finished board.
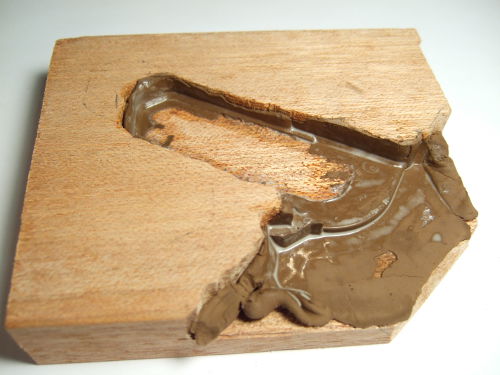
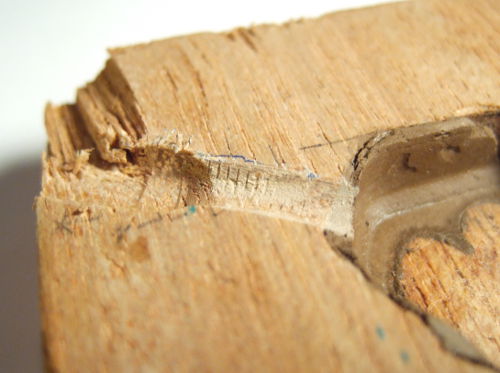
Fill The Gaps
We'll use wood filler to get a perfect fit between the grip and the frame.
First, put a good coat of oil on the frame so it doesn't stick to the wood filler. Put a good bead of filler all around the edges.
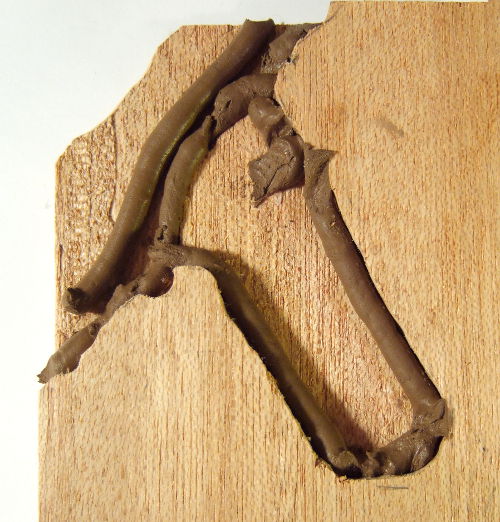
Press the frame into the grip and clamp the grip into place. Be sure there isn't excess filler under the frame. It can prevent the frame from seating all the way down, which will reduce the depth of the cavity and prevent the frame from sliding into the grip cavity.
Let the filler dry. Carefully remove the frame from the cavity. If any pieces of filler fall out, just repeat the process.
There will be a raised area about half way up the grip. This area must be sanded down so the revolver will slide into and out of the grip when the two boards are clamped together.
I like to coat the filler with a thin layer of wood glue. The glue helps to hold the filler together and adds a smooth surface. You don't want the glue to change the shape or thickness of the filler - so I thin the glue with about 50% water. Sand down any filler that is higher than the board. It's easy to sand down any high spots by laying the board on a flat surface with a piece of sandpaper.
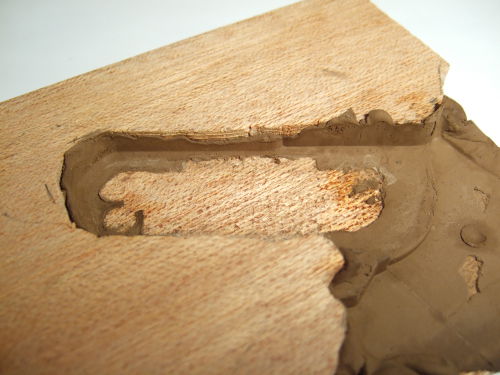
Bolt Channel
This step will create a channel for the bolt.
Screw the bolt into the frame and set the frame into the grip. Draw an outline of the bolt on the wood. Here I use a bolt with the threads removed to create a nice, straight line.
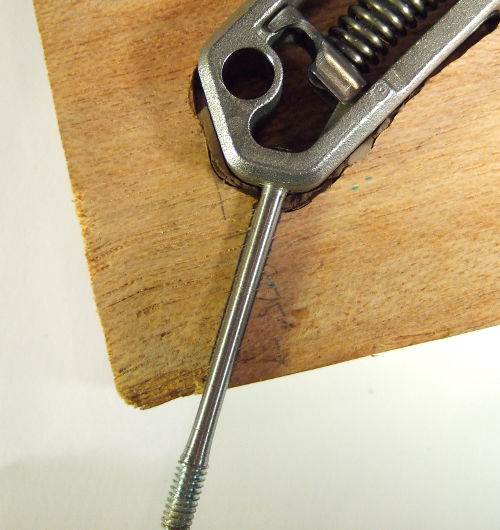
Mark the area that will be carved out.
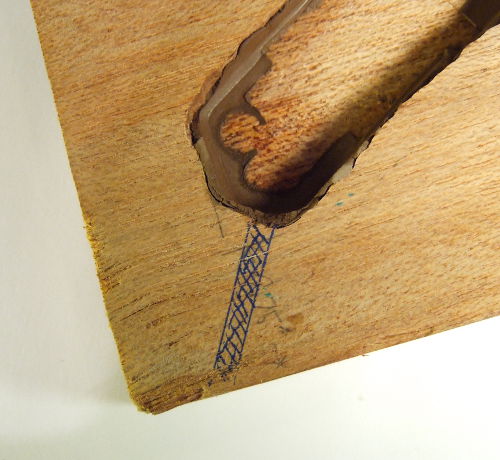
There are several ways to carve the bolt channel. One method is to use the drill press to drill the channel.

You can also wrap a piece of sandpaper around the bolt and use that to sand the channel. The channel should be carefully carved to create a tight fit with the bolt.
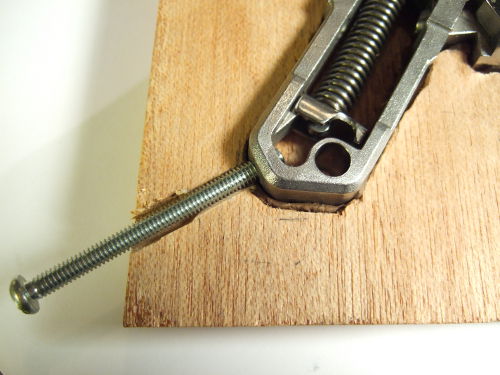
When the channel begins to get close to the required depth, place the frame in the wood with the bolt in and rotate the bolt while applying a little downward pressure on the frame. This will leave thread marks in the wood where the bolt is making contact with the wood.
Sand the area with thread marks and repeat the process until the bolt turns freely.
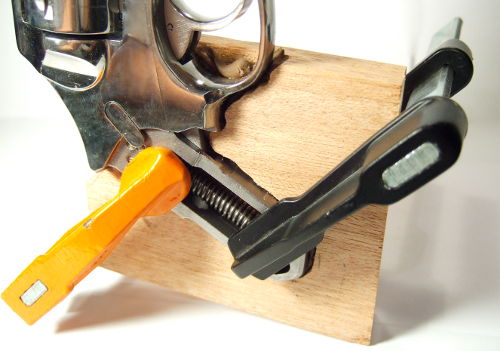
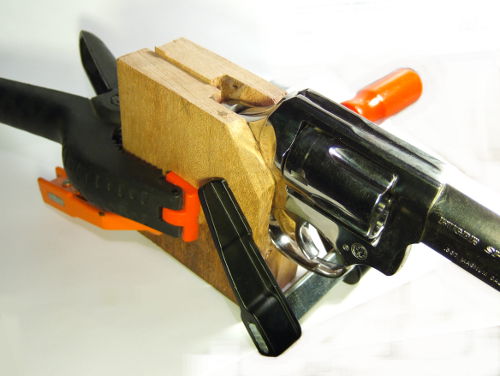
Clamp Together
This step will join the two boards together.
Enclose the revolver in the two boards and clamp them together. If the revolver cannot be moved into and out of the grip then carefully loosen the boards and pull the revolver in and out a few time. Pull the boards apart and look for wear to indicate where the frame is dragging. Carefully sand down those area until the revolver will slide in and out of the grip when tightly clamped. If the revolver is too loose then go back to the wood filler stage and add some more filler.
Apply some wood glue to the two boards and clamp them together. Make sure the revolver is in the boards so they will be properly aligned. Wait for the glue to dry.
Carving The Grip
In this step you'll carve the grip into the final shape.
Start with a final shape in mind and work toward it. You can draw a rough outline of the final shape on the boards, then use a band saw to cut out the grip. You can also just drill a bunch of holes around the outline. I use a Dremel with a sanding drum to sculpt the grip. Proceed slowly. This step will take some time and produce a lot of sanding dust. I strongly recommend a mask and goggles.
After you reach the final shape you'll need to bore the bolt hole to recess the bolt head. If your final shape is going to be rounded, you may want to do this step while the sides of the grip are still fairly flat so it's easier to hold in the vice. This can be tricky, but I put the grip in the vice with the revolver installed and with a long bolt coming out of the bolt channel. I carefully align the bolt and the drill bit (I use the router bit). I remove the screw then bore the hole. This allows me to drill the hole straight and properly aligned with the bolt channel.
Finishing
There are several ways to finish the wood. Finishes are subjective, so you should decide how you want your grip finished. I usually sand to a smooth finish, stain and apply several coats of polyurethane. Some woods like oak have large pores and may requires some sort of pore filler if you want to end up with a smooth top coat.
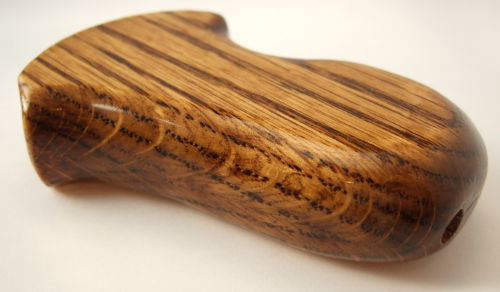
Hopefully after all that work you're rewarded with a beautiful custom grip.