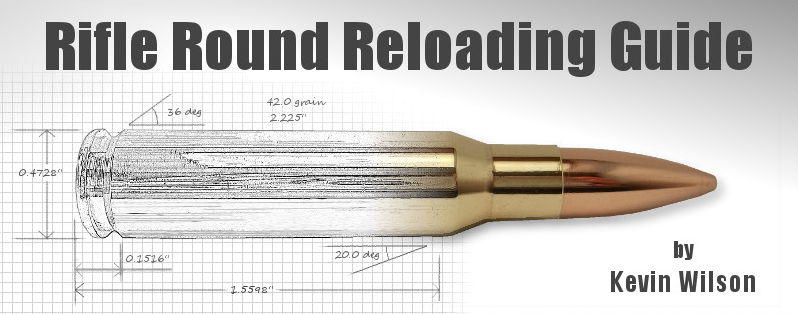
Rifle Round Reloading Guide
by Kevin Wilson
Introduction
This is a basic step-by-step guide to reloading rifle rounds (specifically .308). The procedure for reloading other rifle calibers is basically the same, however the specifications will need to be adjusted. This guide was originally intended to be limited to my own personal use, but I've made it available in hopes that it may help others to reload their own rounds. This guide is orientated to my particular reloading equipment and calibers, so your reloading procedures, equipment and specifications may vary.
This is not a comprehensive reloading guide or a gentle introduction to basic reloading principles. You should already have a good idea how to reload. This guide is more of a blueprint or framework for the reloading process.
Consistency and precision are the keys to successful reloading. Try to make every round identical and as close to the specifications as possible.
Required Materials
The following items are required, helpful or optional:
- A well lit workbench away from distractions, open flames, etc.
- Brass shell cases
- Primers
- Powder
- Bullets
- Reloading press
- Depriming / resizing die
- Repriming die
- Bullet seating die
- Shell holder
- Case trimmer
- Case holder
- Deburring / chamfer tool
- Primer pocket cleaner
- Primer pocket reamer
- Brass case cleaning device (any type) + media
- Case lube (optional depending on die)
- Scale with check weight (accurate to 0.1 grain)
- Powder funnel
- Calipers (accurate to 0.001 inch)
- Run-out gauge (optional)
- Bullet comparator
- Wire brush sized to fit the case neck
- Magnifying glass (if you have older eyes)
- Safety glasses
- Reloading manual
- Cleaning supplies
- Patience and attention to detail
Special Information

Through the guide I use this type of area for information that is potentially dangerous. Please pay careful attention to this information.

Through the guide I use this type of area for information that can help you avoid common mistakes.
Contact
You may contact me at kevin@kevinsworkbench.com
Disclaimer
I'm not a reloading expert. Reloading procedures will differ depending on equipment and other factors. I'm not responsible for any damage caused by the techniques or information presented in this article.
© 2011-2018 by Kevin Wilson
Index
Develop A Plan
Preliminary Brass Case Cleaning And Inspection
Deprime The Brass
Clean The Brass
Post-Cleaning Inspection
Clean And Ream The Primer Pocket
Lube The Brass (optional)
Resize The Brass
Post-Resizing Inspection
Trim The Brass
Deburr And Chamfer The Brass
Clean The Neck
Sort And Label (optional)
Reprime The Brass
Measure The Powder And Fill The Case
Seat The Bullet
Develop A Plan
Prerequisites
Research
Required Equipment
- Reloading manual
Required Time
Varies
Purpose
Determine all aspects of the rounds.
Process Overview
Before you start reloading rounds, you should determine the brand of components, how much powder to use, the case overall length (C.O.A.L.), and all the other factors required to reload a round. You'll need to consult a reloading manual to check the maximum and minimum loads allowable. You should determine the dimensional specification of your rounds, including tolerances. If you're working up a load, you should create a log to record the specifications and accuracy of each round.
Preliminary Brass Case Cleaning And Inspection
Prerequisites
None
Required Equipment
- Cleaning supplies (varies)
Required Time
10 - 15 minutes / 50 rounds
Purpose
Determine if the case is suitable for reloading.
Process Overview
No need for a thorough cleaning of fired brass, just wipe off the lose dirt and powder residue.
Inspect the brass for:
- Split neck
- Split body
- Signs of head separation
- Shoulder damage
- Stretched primer pocket
If you see any of these signs, do not hesitate to throw away the case. Also, check for primers backing out and cratered primers, which could indicate excessive pressure.
Deprime The Brass
Required Equipment
- Reloading press
- Depriming / resizing die
Specifications
None
Required Time
10 minutes / 50 rounds
Warnings
I do not recommend resizing the brass before cleaning.
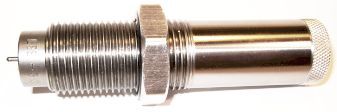
There are different dies that can be used to deprime / resize the brass. The instructions differ for each type of die. The following instructions are for the Lee collet neck sizer die.
Purpose
Removes the primer.
Process Overview
Typically the brass will be cleaned first, then deprimmed and resized. I prefer to deprime before cleaning so the cleaning media can clean the primer pocket. It also prevents cleaning media and water from accumulating between the brass and the primer. Either way will work.
Using the Lee collet die:
- Insert the shell holder at the bottom of the ram.
- Turn the locking ring to the top of the die.
- Raise the ram and hold it up.
- Screw the die into the press until it contacts the shell holder and stops.
- Lower the ram.
- Turn the die in an additional 1 turn and tighten the locking ring.
To deprime without resizing, follow the normal depriming / resizing procedure, but do not raise the ram up completely, only far enough to deprime the brass.
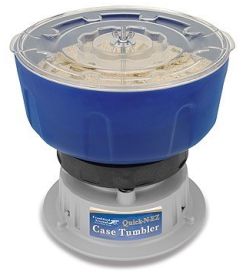
Clean The Brass
Prerequisites
Deprime
Required Equipment
- Cleaning equipment (varies)
Specifications
None
Required Time
5 hours / 50 rounds (varies)
Purpose
Prevent damage to dies, aids inspection, increases accuracy.
Process Overview
Polish the brass and brush inside the neck. You may use any method you choose (tumbling, vibrating, old rag, etc.)
Different types of cleaning media are available for tumble cleaners. Walnut shells and corn cobs are common. Not all media is created equal. Cheaper media can often be found at pet stores, but it may break down quicker, leave dusty residue or produce more dust. I use Zilla Desert Blend ground walnut shells from the pet store and it works great. I use 1 cup to polish 10 - 20 shells at a time. I polished 100 shells before changing the media. I also add about 1 teaspoon of green wax stick metal buffing compound. The shells require 2 - 5 hours to polish, depending on their condition. I use a vibratory cleaner that I built myself.
Remove any residue from the brass (inside and out). I prefer to rinse with hot water, but I do not use soap.
Post-Cleaning Inspection
Prerequisites
Cleaning
Required Equipment
- None
Required Time
10 minutes / 50 rounds
Purpose
Determine if the case is suitable for reloading.
Process Overview
Inspect for defects revealed by cleaning and polishing. Refer to previous inspection list. Check for blocked flash holes.
Clean And Ream The Primer Pocket
Prerequisites
Deprime
Required Equipment
- Primer pocket cleaner
- Primer pocket reamer
- Cotton swabs
Specifications
Primer pocket depth: 0.130" ± 0.002"
Required Time
20 minutes / 50 rounds
Warnings
Avoid reaming the pockets too much.
Purpose
Sometimes residue will get in the primer pocket. A new primer may not seat or seat improperly if the primer pocket is not clean.
Process Overview
Use the primer pocket cleaner then the primer pocket reamer. Reaming the pocket may not be required unless the new primers are difficult to seat into the primer pocket.
Lube The Brass (optional)
Required Equipment
- Case lube
Specifications
None
Required Time
5 minutes / 50 rounds
Purpose
Prepares the case for resizing.
Process Overview
Lube is not necessary for all the resizing dies. The Lee collet neck resizing die does not require lube. If required, apply a thin layer to the case.
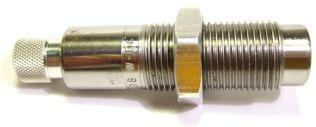
Resize The Brass
Prerequisites
Cleaning, lube (optional)
Required Equipment
- Reloading press
- Depriming / resizing die
Specifications
None
Required Time
15 minutes / 50 rounds
Warnings
Be sure the case is clean or you may damage the inside surface of the die.
There are two different case resizing methods: "neck" and "full length". Neck resizing is reported to be more accurate, but should only be used if the brass will be fired in the same rifle again. If the brass will be fired in a different rifle, it should be full length resized. The instructions differ for each type of die. The following instructions are for neck resizing using the Lee collet die.
Purpose
After a round is fired, the case will expand. This resizing process will squeeze the case neck back to it's correct size.
Process Overview
I use the Lee collet die. It should still be in the press from the depriming step. If not, follow the previous setup instructions.
Raise the ram and apply "moderate" pressure. Rotate the case half a turn and repeat. Rotating the case will help to ensure even sizing. Test the resizing procedure by trying to seat a bullet with your fingers. If the bullet enters the neck easily then repeat the resizing with more force applied to the ram. Resizing force is correct when the bullet cannot be seated with finger pressure and / or vertical striation marks are seen on the outside of the case neck. Clean any case lube.
Post-Resizing Inspection
Prerequisites
Resizing
Required Equipment
- None
Required Time
5 minutes / 50 rounds
Purpose
Determine if the case is suitable for reloading.
Process Overview
Inspect for damage caused by resizing.
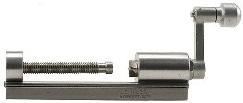
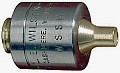
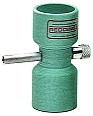
Trim The Brass
Required Equipment
- Case trimmer
- Case holder
Specifications
Case length: 2.005" ± 0.001" (for .308)
Required Time
20 minutes / 50 rounds
Purpose
The case will stretch after firing a round. Use the case trimmer to cut the case back to the required length.
Process Overview
I use a Wilson case trimmer. Verify the case trimmer is set to the proper length. Insert a case into the case holder. Place the case holder into the case trimmer and hold the case firmly to prevent the trimmer from pulling the case forward as it trims.
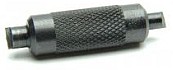
Deburr And Chamfer The Brass
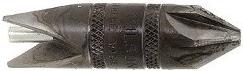
Prerequisites
Trim
Required Equipment
- Deburring / chamfer tool
Specifications
None
Required Time
6 to 8 minutes / 50 rounds
Purpose
The case trimmer will leave a square end on the case and possibly a burr. Use the deburring / chamfer tool to clean the end of the brass and chamfer the end so it will be easier to insert the bullet.
Process Overview
A couple rotations with the deburring / chamfer tool with light pressure should be adequate.
Clean The Neck
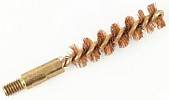
Required Equipment
- Wire brush
- Cotton swabs
Required Time
15 minutes / 50 rounds
Purpose
Remove lose shavings from deburring / chamfering
Process Overview
Run a wire brush through the neck. Swirl a cotton swab around inside the case to catch lose shavings. Wipe off the case. Look for shavings in the neck, and blocked flash holes in the primer pocket.
Sort And Label (optional)
This is an optional step to increase precision. Sort the bullets by weight. Sort the cases by length, weight and brand. Label the cases with permanent marker for record keeping.
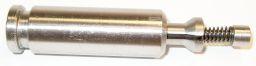
Reprime The Brass

Prerequisites
Deprime, clean the primer pocket, resize
Required Equipment
- Reloading press
- Repriming die
- Primers
Specifications
Primer seating depth: 0.004" ± 0.002" below the case head
Required Time
15 to 20 minutes / 50 rounds
Purpose
Insert the new primer
Warnings
Primers can explode if they are crushed. During this operation, be extremely careful that the primers are not inserted sideways or upside down. Do not look down into the case while the brass is being reprimed. Wear safety glasses to protect your eyes. You may want to consider hearing protection as an extra precaution.
Process Overview
- Insert a shell holder in the top of the press.
- Insert the priming die into the bottom shell holder.
- Insert a primer into the die cup.
- Insert a shell into the top shell holder.
- Raise the ram to seat the primer.
Verify the primer seating depth. If the primers will not seat to the proper depth, you may need to clean and / or ream the primer pockets.
Measure The Powder And Fill The Case
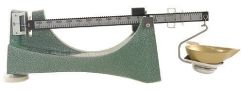
Required Equipment
- Powder
- Powder scale
- Check weights
- Powder trickler
- Powder funnel
Specifications
Powder weight (varies)
Required Time
30 to 60 minutes / 50 rounds (varies)
Purpose
Fills the case with powder
Warnings
It's critical to fill the case with the proper amount of powder. You must verify the proper amount of powder with a reloading manual, preferably several manuals. Be careful that you don't get distracted after filling the case with powder and accidentally fill the case a second time.
Process Overview
Calibrate your scale with a verified check weight. If you don't have a check weight, you can use several clean dimes (minted 1965 to current). They should weigh 35 grains each. Weigh the powder. Use the powder trickler to add small amounts of powder. Use the powder funnel to fill the cases.
Seat The Bullet
Required Equipment
- Reloading press
- Bullet seating die
- Bullets
Specifications
C.O.A.L. (varies)
Required Time
15 to 20 minutes / 50 rounds
Purpose
This procedure will seat a bullet in the case.
Process Overview
Do not completely seat the bullet in one press. Rotate the case and bullet several times as the bullet is seated. This will help to ensure the bullet is seated straight with minimal run-out.
- Insert the shell holder into the bottom of the press and raise the ram.
- Screw the die into the top of the ram until the die contacts the shell holder.
- Lower the ram and turn the die an additional 1/4 turn.
- Tighten the locking nut.
The die should be adjusted for proper case overall length (C.O.A.L.) using the following procedure:
- Adjust the die to an excessively long C.O.A.L.
- Seat a bullet in the case.
- Measure the C.O.A.L. using calipers and a bullet comparator to determine the proper die adjustment.
- Repeat steps 2 and 3 until the correct C.O.A.L. is achieved.
Test each round for excessive run-out to ensure the bullet is seated straight. This step is optional. You can use a run-out gauge simply roll the round on a flat surface and watch for wobble.
It's important to seat the bullet to the proper depth, which will result in the correct C.O.A.L. for your rifle. The C.O.A.L. must not be measured from the tip of the bullet because different bullets have different shapes. You must use a bullet comparator to measure from the base of the round to the bullet ogive. I use the Hornady bullet comparator and digital calipers.
To determine the proper C.O.A.L. for your rifle, you must first measure the C.O.A.L. of a round with the bullet pressed against the lands in the barrel. There are a few methods to get this measurement, but I simply chamber a round with a snug but movable bullet seated at an excessively long C.O.A.L. The bullet will be pushed into the case as the bolt slides forward. I carefully extract the round and take the C.O.A.L. measurement. I recommend repeating the process several times to ensure accuracy. Different bullets will result in different C.O.A.L. so the measurement must be made with every type of bullet. This is the absolute maximum C.O.A.L. for your rifle. Having the bullet against the lands can cause excessively high pressure in the chamber, but moving the bullet too far off the lands can decrease accuracy. Generally, you should size the round C.O.A.L. so the bullet sits about 0.020" ± 0.010" off the lands, although many people may recommend a different distance. I recommend you research the subject and decide on your own preferred distance. Also note that over time the lands in your barrel may wear down, so the C.O.A.L. should be periodically adjusted.
In my rifle, C.O.A.L. on the lands was 2.245" with Nosler Custom Competition 168 grain HPBT bullet, and 2.225" with Lapua Scenar 185 grain bullets (measured with the Hornady bullet comparator on Jan. 1, 2007)
(In my rifle):
| C.O.A.L. (in) | Off Lands (in) | |
|---|---|---|
| NCC 168gr | Lapua Scenar 185gr | |
| 2.245 | 2.225 | 0.000 |
| 2.240 | 2.220 | 0.005 |
| 2.235 | 2.215 | 0.010 |
| 2.230 | 2.210 | 0.015 |
| 2.225 | 2.205 | 0.020 |
| 2.215 | 2.195 | 0.030 |
| 2.205 | 2.185 | 0.040 |
| 2.195 | 2.175 | 0.050 |
Lee Bullet Seating Die Adjustment:
| Turns | Rotation (deg) | Vertical Movement (in) |
|---|---|---|
| 18 | 6480 | 1 |
| 10 | 3600 | 0.556 |
| 5 | 1800 | 0.278 |
| 2 | 720 | 0.111 |
| 1 | 360 | 0.056 |
| 0.5 | 180 | 0.028 |
| 0.3 | 108 | 0.017 |
| 0.2 | 72 | 0.011 |
| 0.1 | 36 | 0.006 |
| 0.05 | 18 | 0.003 |
| 0.01 | 3.6 | 0.001 |
Miscellaneous Information
Links
You may also be interested in my Ruger SP-101 Disassembly and Trigger Job Guide.
Check out the Ultimate Reloading Guide for good information about the basics of reloading including, equipment, manuals, tips, hints, safety, and much more.
Support
You may contact me at kevin@kevinsworkbench.com