Overview
This page documents the design and construction of my workbench.
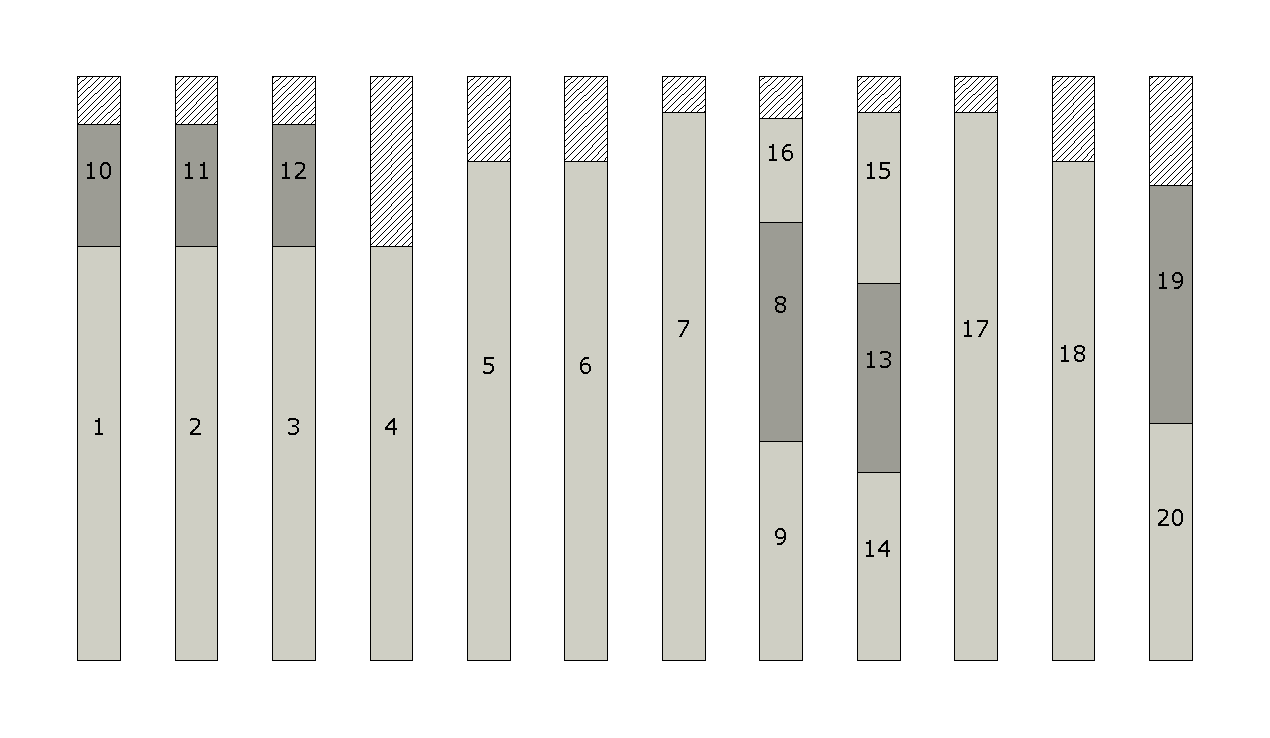
This is a cheap, simple and easy to build workbench. The design and construction of the workbench were constrained by my limited selection of tools, materials, money and carpentry experience. The only tools available at the time of construction are a table saw, compound miter saw, circular saw, pocket hole jig, and the obligatory set of basic tools (tape measure, square, drill, clamps, hammer, screw drivers, etc.) I also do not have access to a wide array of lumber, so the workbench will be constructed (almost) completely out of 2x4s and plywood. All the lumber had to fit in my small car, so the maximum length of all materials is limited to 4'. I don't have any experience making "real" joints, so I used screwed, nailed and glued butt joints almost exclusively.
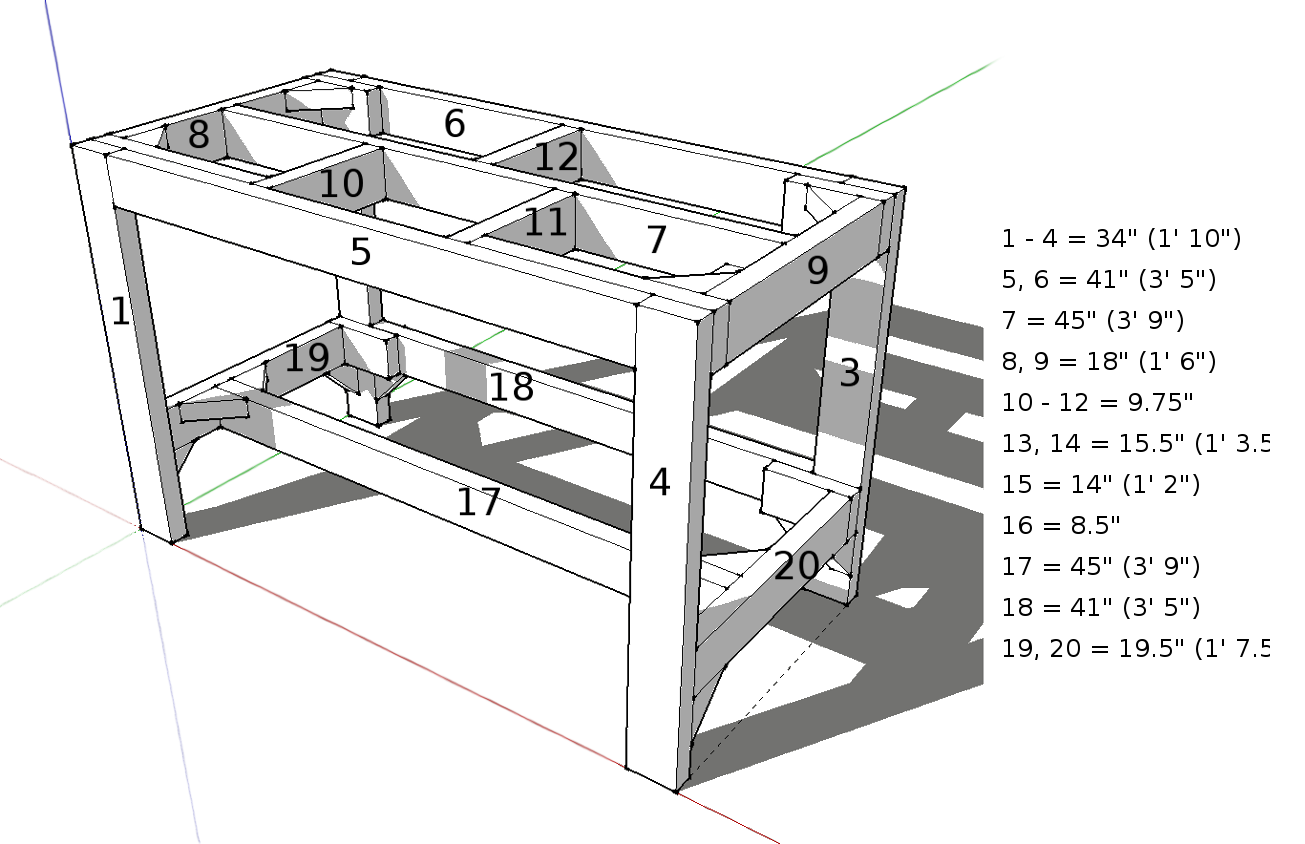
The structural design is based on Vierendeel girders. Typically, cross braces are used (between opposite corners) in a space truss to brace the structure against loads. However, cross braces would interferer with the placement of vices and drawers, so they cannot be utilized. In place of cross members I have used small braces in the corners to strengthen the joints.
Space Frame Truss

Vierendeel Girders
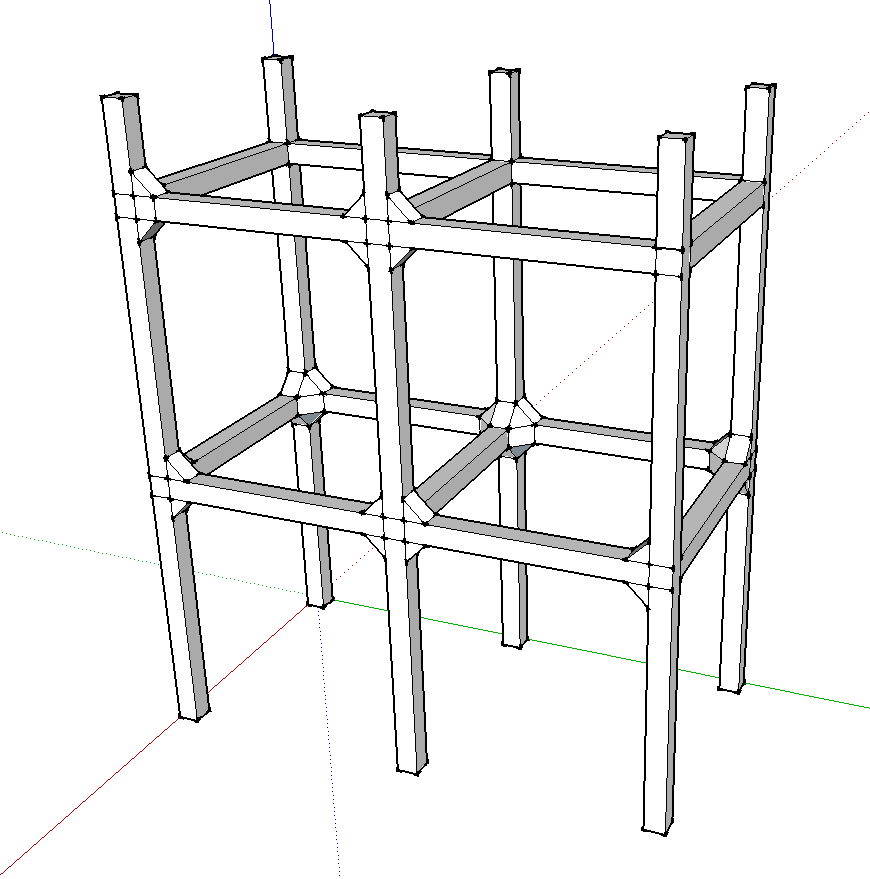
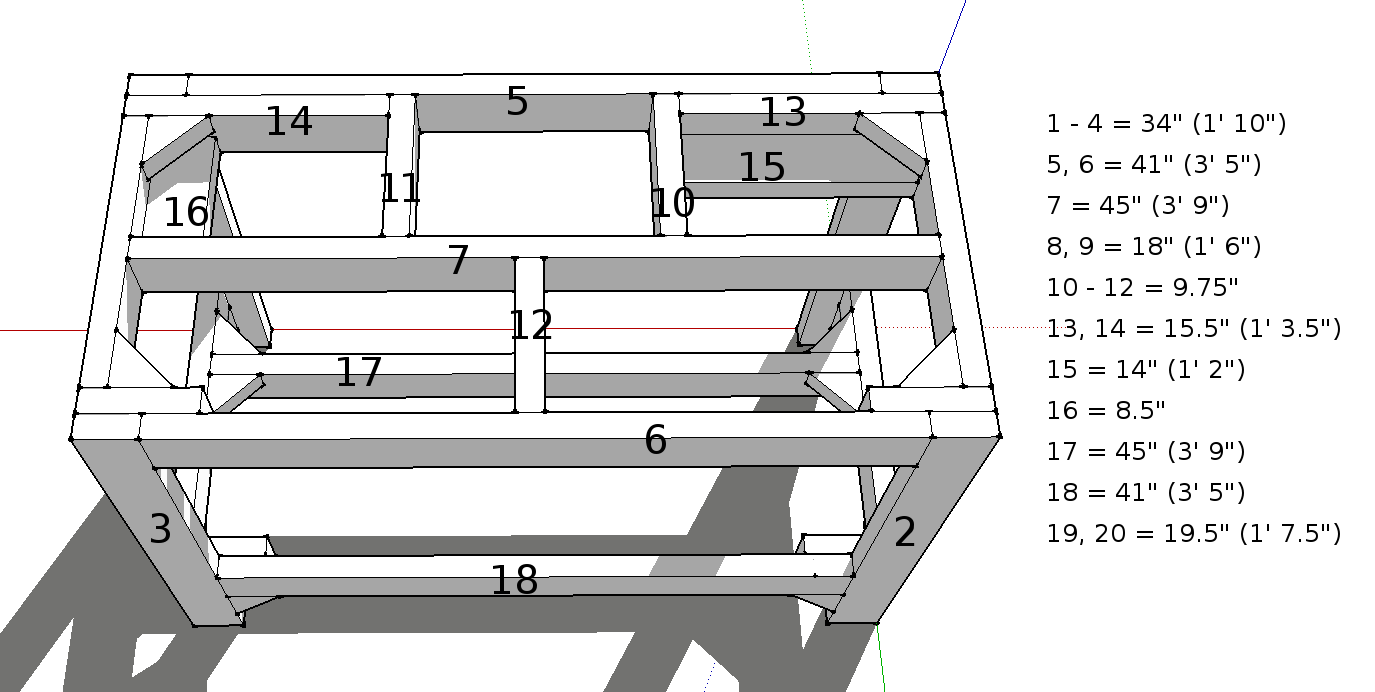
I wanted the workbench to be relatively light weight so I could easily move it around myself. A butcher block type top surface would not be feasible. I opted to create the top using plywood and 2x4 braces into a basic torsion box configuration. I added a second sheet of plywood under the bracing to increase strength and prevent bugs from making their home under the top sheet of plywood.
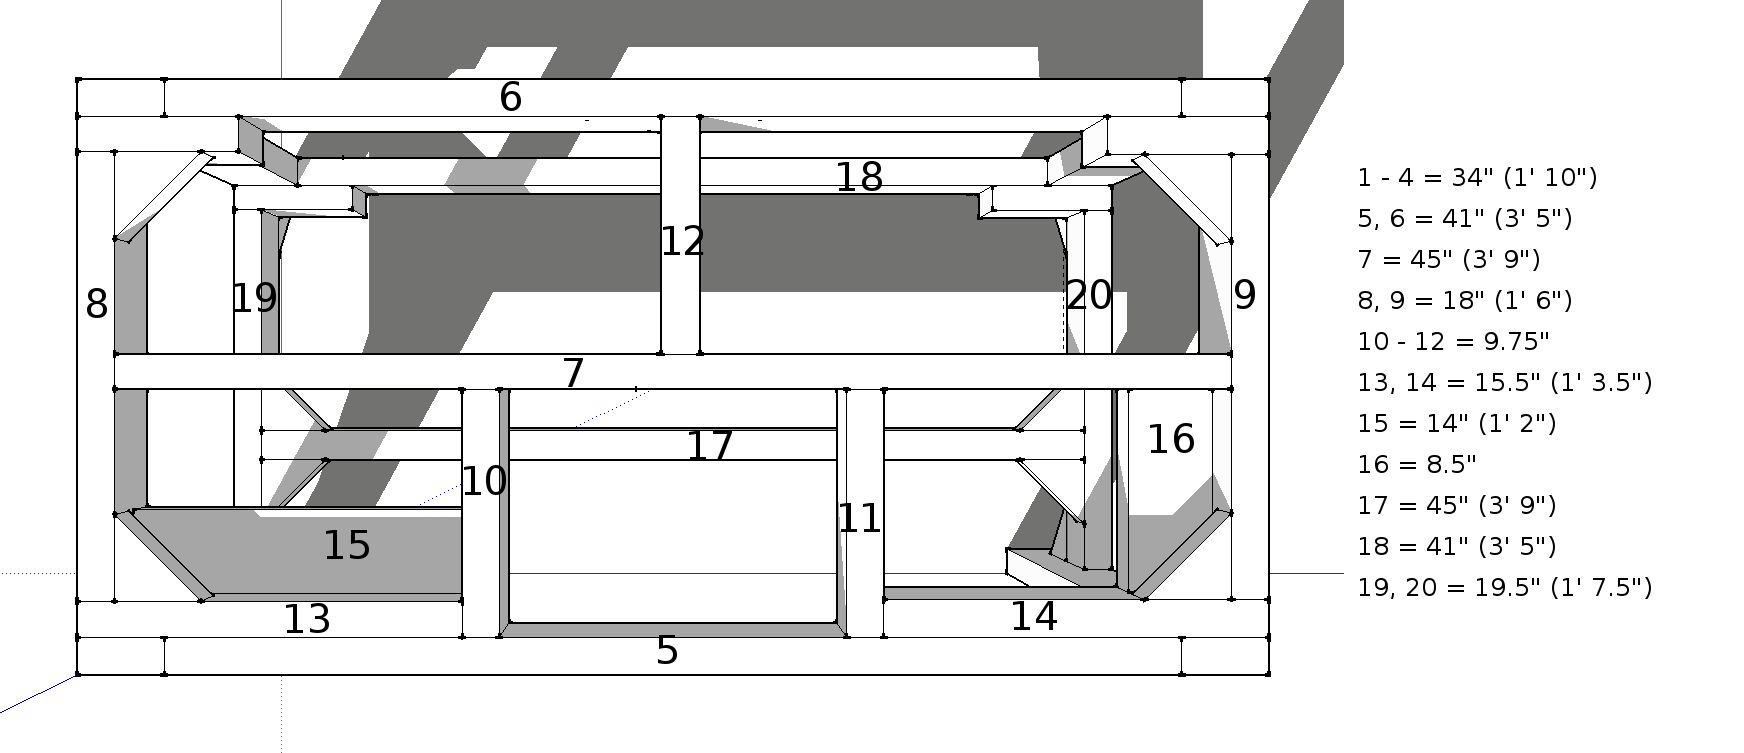
I've included extra bracing in the front-left corner for a face vice. There's another brace located on the right side for a tail vise. I plan to mount a reloading press on the front-right side. The press requires almost 3" mounting depth, which should be satisfied by the existing corner braces located in that area. Feel free to add additional bracing to suit your particular needs.
I've set the lower-front stringer back in toe kick fashion. Corner braces are omitted so a shelf could be added, if desired.
As an added challenge, I wanted the workbench to be aesthetically pleasing. Anyone can nail together some 2x4s and have it look like crap. I wanted my bench to look nice (or as nice as possible given my aforementioned limitations).